- 環境とデプロイを見る
- 環境の検索
- CI/CD 変数
- 環境の種類
- 環境のデプロイ階層
- 手動デプロイの設定
- デプロイごとに新しく取り込まれたマージリクエストを追跡します。
- 環境の操作
- 関連するトピック
- トラブルシューティング
環境とデプロイ
環境はコードがデプロイされる場所を記述します。
GitLab CI/CDが環境にコードのバージョンをデプロイするたびに、デプロイが作成されます。
GitLab:
- 各環境へのデプロイの全履歴を提供します。
- デプロイを追跡するため、サーバーに何がデプロイされているかを常に把握できます。
プロジェクトに関連付けられているKubernetesのようなデプロイサービスがあれば、それを使ってデプロイを支援することができます。
環境とデプロイを見る
前提条件:
- 少なくともレポーターロールを持っている必要があります。
プロジェクトの環境リストを表示するには、いくつかの方法があります:
-
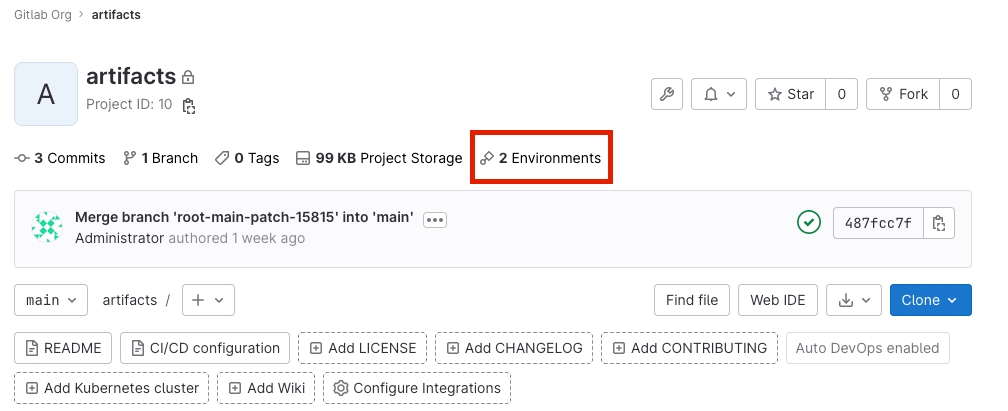
左サイドバーで、[オペレーション] > [環境] を選択します。環境が表示されます。
-
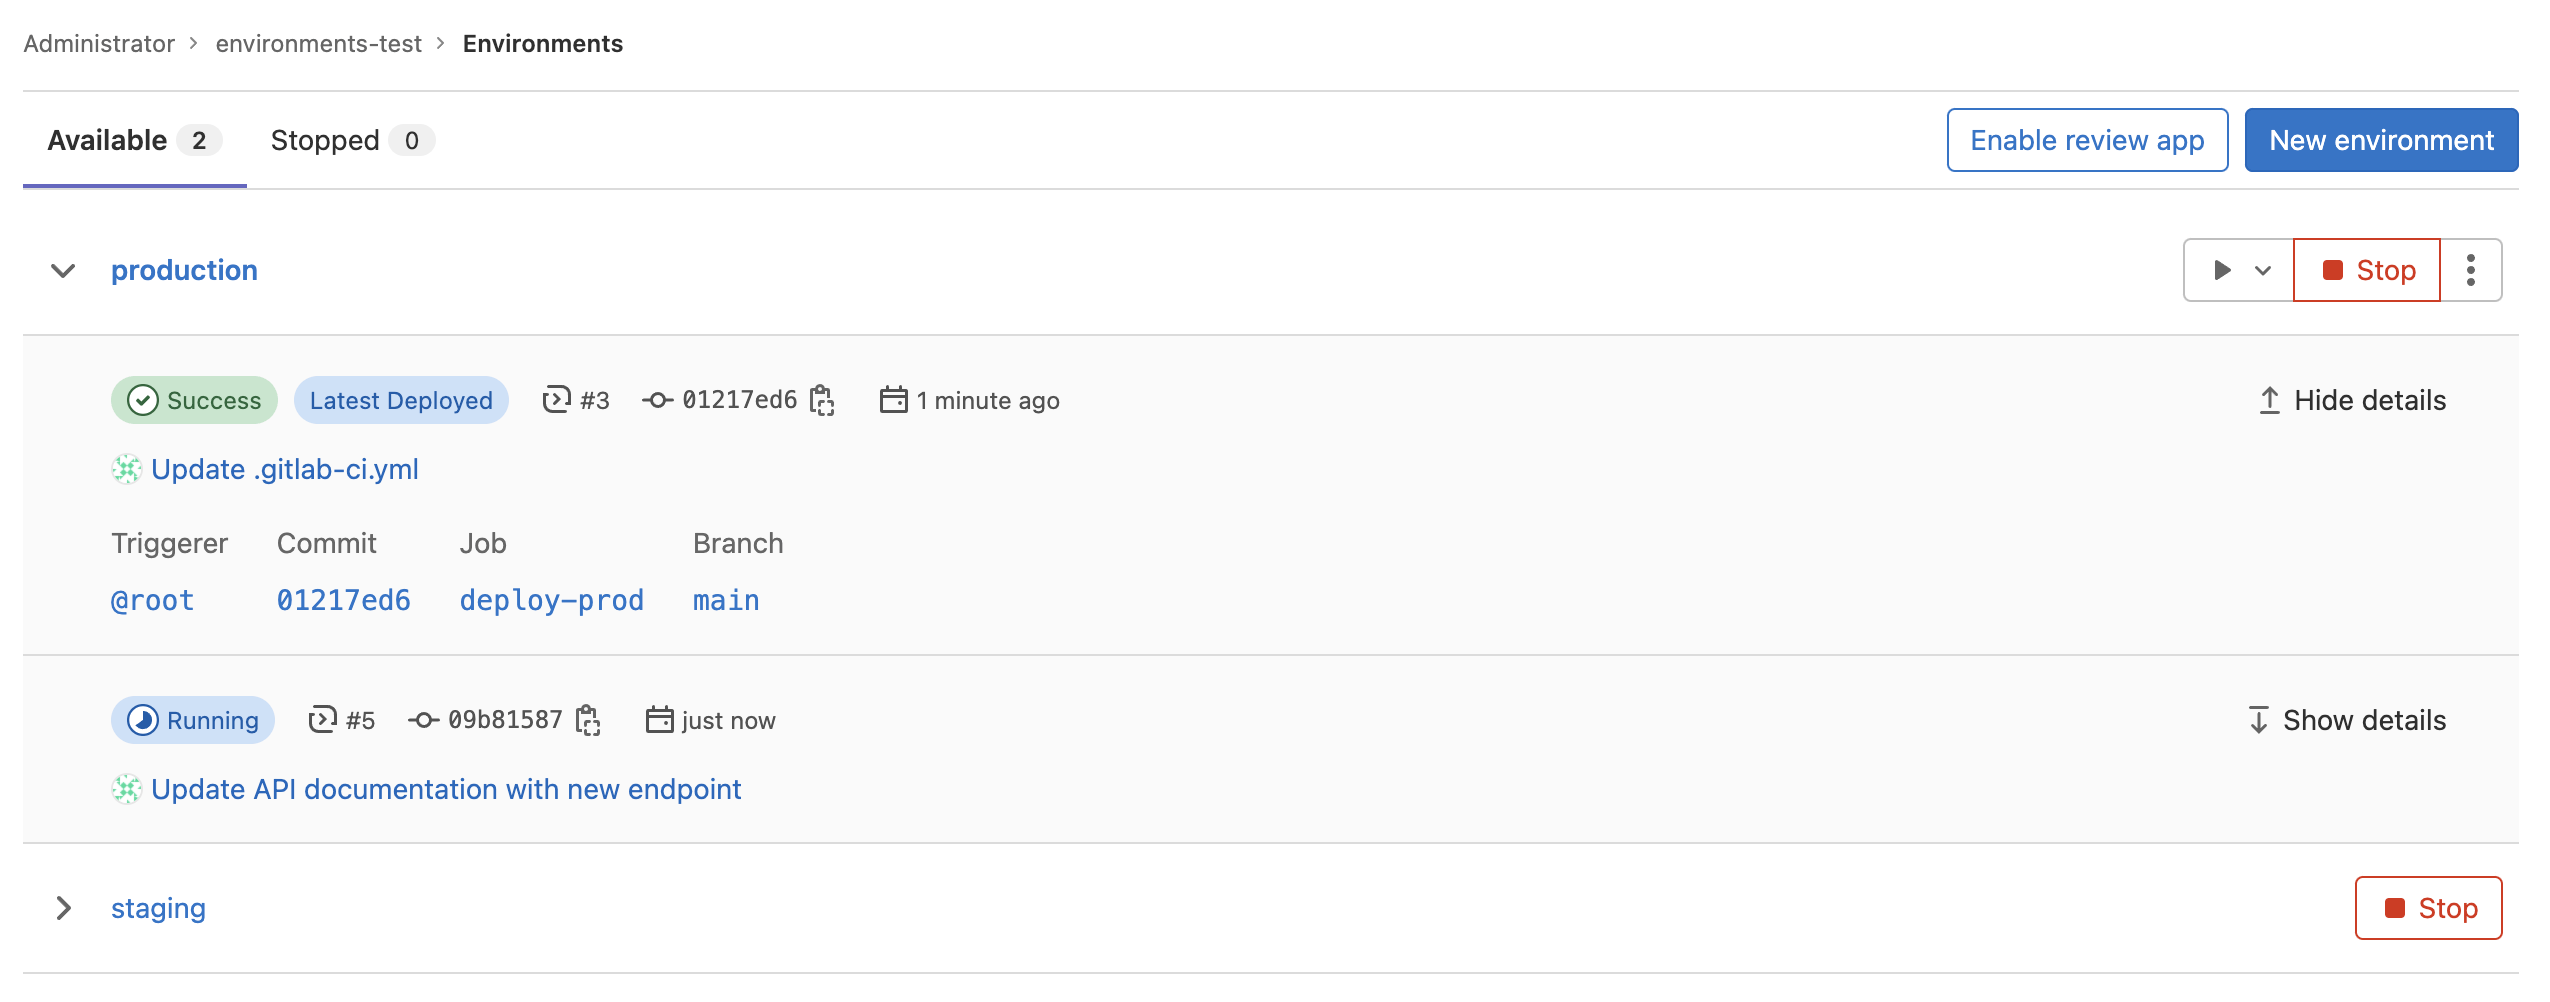
環境のデプロイのリストを表示するには、環境名 (例:
staging) を選択します。
デプロイがこの一覧に表示されるのは、デプロイ ジョブによって作成された後です。
環境の検索
- GitLab 15.5 で導入されました。
- フォルダ内の環境検索はGitLab 15.7で機能フラグ
enable_environments_search_within_folderで導入されました。デフォルトで有効。
名前で環境を検索するには
- 左のサイドバーで「検索」または「移動」を選択してあなたのプロジェクトを検索します。
- オペレーション > 環境を選択します。
- 検索バーに検索語を入力します。
- 検索語の長さは3文字以上にしてください。
- マッチングは環境名の先頭から適用されます。
- たとえば、
develは環境名developmentにマッチしますが、elopにはマッチしません。
- たとえば、
- フォルダ名形式の環境では、マッチングはベースフォルダ名の後に適用されます。
- たとえば、名前が
review/test-appの場合、検索語testはreview/test-appに一致します。 - また、フォルダ名の前に
review/testのような接頭辞をつけて検索すると、review/test-appに一致します。
- たとえば、名前が
CI/CD 変数
環境とデプロイをカスタマイズするために、定義済みのCI/CD変数のいずれかを使用し、カスタムCI/CD変数を定義することができます。
環境の種類
環境には静的なものと動的なものがあります:
- 静的環境
- 通常、連続したデプロイで再利用されます。
- 例えば、
stagingやproductionなどです。 - 手動またはCI/CDパイプラインの一部として作成。
- 動的環境
- 通常、CI/CDパイプラインで作成され、単一のデプロイでのみ使用され、その後停止または削除されます。
- 通常はCI/CD変数の値に基づいた動的な名前を持ちます。
- レビューアプリの機能。
静的環境の構築
UIまたは.gitlab-ci.yml ファイルで静的環境を作成できます。
UIでは
前提条件:
- 少なくともDeveloperロールを持っている必要があります。
UIで静的環境を作成するには:
- 左のサイドバーで「検索」または「移動」を選択してあなたのプロジェクトを検索します。
- オペレーション > 環境を選択します。
- 環境の作成]を選択します。
- 各項目を入力してください。
- Save を選択します。
.gitlab-ci.yml 。
前提条件:
- 少なくともDeveloperロールを持っている必要があります。
静的環境を作成するには、.gitlab-ci.yml ファイルに次のように記述します:
-
deployステージでジョブを定義します。 -
nameurlパイプラインの実行時にその名前の環境が存在しない場合、作成されます。
environment キーワードの詳細については、.gitlab-ci.yml キーワード・リファレンスを参照してください。たとえば、staging という名前の環境をhttps://staging.example.com という URL で作成します:
deploy_staging:
  stage: deploy
  script:
    - echo "Deploy to staging server"
  environment:
    name: staging
    url: https://staging.example.com
動的環境の作成
動的環境を作成するには、各パイプラインに固有のCI/CD変数を使用します。
前提条件:
- 少なくともDeveloperロールを持っている必要があります。
動的環境を作成するには、.gitlab-ci.yml ファイルに記述します:
-
deployステージでジョブを定義します。 - ジョブで、以下の環境属性を定義します:
environment キーワードの詳細については、.gitlab-ci.yml キーワード・リファレンスを参照してください。次の例では、deploy_review_app ジョブが実行されるたびに、環境名と URL が一意の値で定義されます。
deploy_review_app:
  stage: deploy
  script: make deploy
  environment:
    name: review/$CI_COMMIT_REF_SLUG
    url: https://$CI_ENVIRONMENT_SLUG.example.com
  rules:
    - if: $CI_COMMIT_BRANCH == "main"
      when: never
    - if: $CI_COMMIT_BRANCH
動的な環境URLの設定
外部ホスティングプラットフォームの中には、デプロイごとにランダムな URL を生成するものがあります(例:https://94dd65b.amazonaws.com/qa-lambda-1234567)。そのため、.gitlab-ci.yml ファイルで URL を参照することが難しくなります。
この問題にアドレスするには、一連の変数をレポートバックするようにデプロイ ジョブを設定します。これらの変数には、外部サービスによって動的に生成された URL が含まれます。GitLab はdotenv (.env) ファイル形式をサポートしており、environment:url の値を.env ファイルで定義された変数で展開します。
この機能を使うには、.gitlab-ci.yml でartifacts:reports:dotenv キーワードを指定します。
また、https://$DYNAMIC_ENVIRONMENT_URL のように、environment:url で URL の静的な部分を指定することもできます。DYNAMIC_ENVIRONMENT_URL の値がexample.com の場合、最終結果はhttps://example.comになります。
review/your-branch-name 環境に割り当てられた URL は UI で表示されます。
概要については、ジョブ終了後に動的URLを設定するを参照してください。
次の例では、レビューアプリがマージリクエストごとに新しい環境を作成します:
-
reviewジョブはプッシュされるたびにトリガーされ、review/your-branch-nameという名前の環境を作成もしくは更新します。環境の URL は$DYNAMIC_ENVIRONMENT_URLに設定されます。 -
reviewのジョブが終了すると、GitLab はreview/your-branch-name環境の URL を更新します。deploy.envレポートアーティファクトを解析し、実行時に作成された変数リストを登録し、environment:url: $DYNAMIC_ENVIRONMENT_URLを展開して環境 URL に設定します。
review:
  script:
    - DYNAMIC_ENVIRONMENT_URL=$(deploy-script)                                 # In script, get the environment URL.
    - echo "DYNAMIC_ENVIRONMENT_URL=$DYNAMIC_ENVIRONMENT_URL" >> deploy.env    # Add the value to a dotenv file.
  artifacts:
    reports:
      dotenv: deploy.env                                                       # Report back dotenv file to rails.
  environment:
    name: review/$CI_COMMIT_REF_SLUG
    url: $DYNAMIC_ENVIRONMENT_URL                                              # and set the variable produced in script to `environment:url`
    on_stop: stop_review

stop_review:
  script:
    - ./teardown-environment
  when: manual
  environment:
    name: review/$CI_COMMIT_REF_SLUG
    action: stop
以下に注意してください。
-
stop_reviewはdotenvレポートのアーティファクトを生成しないので、DYNAMIC_ENVIRONMENT_URL環境変数を認識しません。したがって、stop_reviewのジョブでenvironment:urlを設定すべきではありません。 - 環境URLが有効でない場合(例えば、URLが不正である場合)、システムは環境URLを更新しません。
-
stop_reviewで実行されるスクリプトがリポジトリにしか存在せず、GIT_STRATEGY: noneを使用できない場合は、これらのジョブにマージリクエストパイプラインを設定してください。これにより、機能ブランチが削除された後でも Runner がリポジトリを取得できるようになります。詳細については、Runner の Ref Specs を参照してください。
Add-Content コマンドを使用して.env ファイルに書き込む必要があります。Add-Content -Path deploy.env -Value "DYNAMIC_ENVIRONMENT_URL=$DYNAMIC_ENVIRONMENT_URL"
環境名の変更
環境名を変更することはできません。
環境名を変更したのと同じ結果を得るには、次のようにします:
環境のデプロイ階層
GitLab 13.10で導入されました。
production のような業界標準の環境名を使う代わりに、customer-portal. customer-portalNET のようなコードネームを使いたいこともあるでしょう。のようなcustomer-portal名前を使わない技術的な理由はありませんが、 customer-portalこの名前はもはやその環境が運用環境であることを示すものではありません。
特定の環境が特定の用途に使われることを示すには、階層を使います:
| 環境階層 | 環境名の例 |
|---|---|
production | プロダクション、ライブ |
staging | ステージ、モデル、デモ |
testing | テスト、QC |
development | 開発、レビューアプリ、トランク |
other |
デフォルトでは、GitLabは環境名に基づいて階層を想定しています。その代わりに、deployment_tier キーワード を使って階層を指定することができます。
手動デプロイの設定
手動でデプロイを開始するジョブを作成できます。たとえば
deploy_prod:
  stage: deploy
  script:
    - echo "Deploy to production server"
  environment:
    name: production
    url: https://example.com
  rules:
    - if: $CI_COMMIT_BRANCH == $CI_DEFAULT_BRANCH
      when: manual
when: manual アクション:
- GitLab UI でジョブの再生ボタンを公開します。テキストは**Can be manually deployed to
** です。 - つまり、
deploy_prodのジョブは再生ボタンが選択された時だけトリガーされます。
再生ボタンはパイプライン、環境、デプロイ、ジョブの各ビューにあります。
デプロイごとに新しく取り込まれたマージリクエストを追跡します。
GitLabはデプロイごとに新しくインクルードされたマージリクエストを追跡することができます。デプロイが成功すると、システムは最新のデプロイと前回のデプロイとの間のコミット差分を計算します。この追跡情報は、デプロイ APIを通して取得し、マージリクエストページのポストマージパイプラインで表示することができます。
この追跡を有効にするには、環境を次のように設定する必要があります:
.gitlab-ci.yml のenvironment キーワード のセットアップ例を示します:
# Trackable
environment: production
environment: production/aws
environment: development

# Non Trackable
environment: review/$CI_COMMIT_REF_SLUG
environment: testing/aws
環境の操作
環境が構成されると、GitLabは環境を操作するための多くの機能を提供します。
環境のロールバック
特定のコミットで配置をロールバックすると、_新しい_配置が作成されます。このデプロイには固有のジョブ ID があります。ロールバック先のコミットを指します。
ロールバックを成功させるには、ジョブのscript にデプロイ プロセスが定義されている必要があります。
デプロイジョブのみが実行されます。以前のジョブがデプロイ時に再生成する必要があるアーティファクトを生成する場合は、パイプラインページから必要なジョブを手動で実行する必要があります。たとえば、Terraformを使用していて、plan とapply コマンドが複数のジョブに分かれている場合、デプロイやロールバックを行うジョブを手動で実行する必要があります。
デプロイの再試行またはロールバック
デプロイで問題が発生した場合に、再試行またはロールバックできます。
デプロイを再試行またはロールバックするには、次の手順に従います:
- 左のサイドバーで「検索」または「移動」を選択してあなたのプロジェクトを検索します。
- オペレーション > 環境を選択します。
- 環境を選択します。
- デプロイ名の右側:
- デプロイを再試行するには、[環境に再デプロイ]を選択します。
- デプロイをロールバックするには、以前に成功したデプロイの横にある[環境をロールバッ ク]を選択します。
環境URL
- GitLab 15.2で
soft_validation_on_external_urlというフラグで任意のURLを永続化するように変更。デフォルトでは無効になっています。- GitLab 15.3で一般的に利用可能に。機能フラグ
soft_validation_on_external_urlを削除。
環境URLはGitLabのいくつかの場所で表示されます:
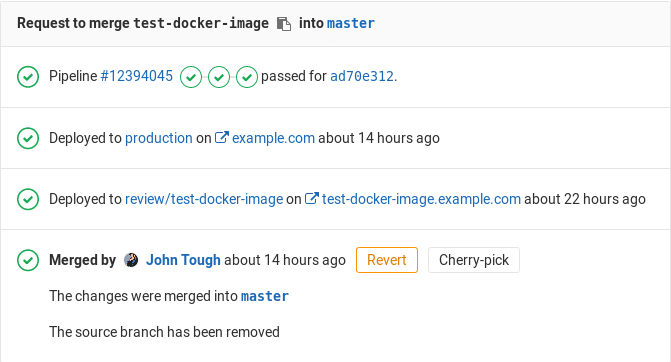
以下の場合、マージリクエストでこの情報を見ることができます:
- マージリクエストは最終的にデフォルトブランチ (通常は
main) にマージされます。 - このブランチは環境 (たとえば
stagingやproduction) にもデプロイされます。
使用例:
ソースファイルから公開ページへの移動
GitLabRoute Mapsを使えば、レビューアプリに設定した環境でソースファイルから公開ページに直接移動することができます。
環境の停止
環境を停止するということは、ターゲットサーバー上でそのデプロイにアクセスできなくなるということです。環境を削除する前に、環境を停止する必要があります。
環境にon_stop アクション が定義されている場合、それを実行して環境を停止します。
ブランチが削除されたときの環境の停止
ブランチが削除されたときに環境を停止するように設定できます。
次の例では、deploy_review ジョブがstop_review ジョブを呼び出し、環境をクリーンアップして停止します。
- 両方のジョブが同じ
rulesまたはonly/except設定を持っている必要があります。そうでないと、deploy_reviewジョブを含むすべてのパイプラインにstop_reviewジョブが含まれない可能性があり、action: stopをトリガーして自動的に環境を停止することができません。 -
action: stopを持つジョブが環境を開始したジョブより後のステージにある場合、 を実行しないかもしれません。 -
マージリクエストパイプラインを使えない場合は、
stop_reviewのジョブでGIT_STRATEGYをnoneに設定してください。ブランチが削除された後、Runnerはコードをチェックアウトしようとしません。
deploy_review:
  stage: deploy
  script:
    - echo "Deploy a review app"
  environment:
    name: review/$CI_COMMIT_REF_SLUG
    url: https://$CI_ENVIRONMENT_SLUG.example.com
    on_stop: stop_review

stop_review:
  stage: deploy
  script:
    - echo "Remove review app"
  environment:
    name: review/$CI_COMMIT_REF_SLUG
    action: stop
  when: manual
マージリクエストがマージまたはクローズされたときに環境を停止します。
マージリクエストパイプライン設定を使用するとき、stop トリガーは自動的に有効になります。
以下の例では、deploy_review ジョブがstop_review ジョブを呼び出し、環境をクリーンアップして停止します。
deploy_review:
  stage: deploy
  script:
    - echo "Deploy a review app"
  environment:
    name: review/$CI_COMMIT_REF_SLUG
    on_stop: stop_review
  rules:
    - if: $CI_MERGE_REQUEST_ID

stop_review:
  stage: deploy
  script:
    - echo "Remove review app"
  environment:
    name: review/$CI_COMMIT_REF_SLUG
    action: stop
  rules:
    - if: $CI_MERGE_REQUEST_ID
      when: manual
環境停止時のパイプラインジョブの実行
環境停止時に実行するジョブを指定できます。
前提条件:
- 両方のジョブに同じルールまたはonly/except設定が必要です。
-
stop_review_appジョブは以下のキーワードが定義されていなければなりません:-
whenのいずれかで定義されていなければなりません:- ジョブレベル。
-
ルール節で。
rulesおよびwhen: manualを使用する場合は、ジョブが実行されなくてもパイプラインが完了できるように、allow_failure: trueも設定する必要があります。
environment:nameenvironment:action
-
.gitlab-ci.yml ファイルで、on_stop キーワードに、環境を停止するジョブの名前を指定します。
以下の例をご覧ください:
-
review_appジョブは、最初のジョブの終了後にstop_review_appジョブを呼び出します。 -
stop_review_appはwhenで定義された内容に基づいてトリガーされます。この場合、manualに設定されているので、実行するにはGitLab UIからの手動アクションが必要です。 -
GIT_STRATEGYはnoneに設定されています。stop_review_appジョブが自動的にトリガーされる場合、ランナーはブランチが削除された後にコードをチェックアウトしようとしません。
review_app:
  stage: deploy
  script: make deploy-app
  environment:
    name: review/$CI_COMMIT_REF_SLUG
    url: https://$CI_ENVIRONMENT_SLUG.example.com
    on_stop: stop_review_app

stop_review_app:
  stage: deploy
  variables:
    GIT_STRATEGY: none
  script: make delete-app
  when: manual
  environment:
    name: review/$CI_COMMIT_REF_SLUG
    action: stop
一定時間経過後の環境停止
一定時間後に環境を自動的に停止するように設定できます。
.gitlab-ci.yml ファイルで、environment:auto_stop_in キーワードを指定します。1 hour and 30 minutes や1 dayのように自然言語で期間を指定します。期間が過ぎると、GitLabは自動的に環境を停止するジョブをトリガーします。
以下の例をご覧ください:
- マージリクエストの各コミットは
review_appジョブをトリガーし、最新の変更を環境にデプロイし、有効期限をリセットします。 - 環境が1週間以上アクティブでない場合、GitLabは自動的に
stop_review_appジョブをトリガーして環境を停止します。
review_app:
  script: deploy-review-app
  environment:
    name: review/$CI_COMMIT_REF_SLUG
    on_stop: stop_review_app
    auto_stop_in: 1 week
  rules:
    - if: $CI_MERGE_REQUEST_ID

stop_review_app:
  script: stop-review-app
  environment:
    name: review/$CI_COMMIT_REF_SLUG
    action: stop
  rules:
    - if: $CI_MERGE_REQUEST_ID
      when: manual
環境の停止予定日時を見る
ある環境が指定した期間後に停止するようにスケジュールされている場合、その有効期限と時刻を表示できます。
環境の有効期限を表示するには:
- 左のサイドバーで「検索」または「移動」を選択してあなたのプロジェクトを検索します。
- オペレーション > 環境を選択します。
- 環境名を選択します。
左上の環境名の横に有効期限が表示されます。
環境の停止予定日時の上書き
環境が指定された期間後に停止するようにスケジュールされている場合、その期限を上書きすることができます。
環境の有効期限をオーバーライドするには:
- 左のサイドバーで「検索」または「移動」を選択してあなたのプロジェクトを検索します。
- オペレーション > 環境を選択します。
- デプロイ名を選択します。
- を選択します({thumbtack})。
auto_stop_in の設定は上書きされ、手動で停止するまで環境はアクティビティを維持します。
on_stop アクションを実行せずに環境を停止する場合
on_stop アクションを実行せずに環境を停止したい場合があります。たとえば、コンピュートクォータを使わずに多くの環境を削除したい場合です。
定義されたon_stop アクションを実行せずに環境を停止するには、パラメータforce=true を指定してStop an environment API を実行します。
UI を使って環境を停止する場合
on_stop アクションをトリガーし、環境ビューから手動で環境を停止するには、停止ジョブとデプロイジョブが同じ resource_group.GitLab UI で環境を停止するには:
- 左のサイドバーで「検索」または「移動」を選択してあなたのプロジェクトを検索します。
- オペレーション > 環境を選択します。
- 停止したい環境の横にある[停止]を選択します。
- 確認ダイアログで、環境の停止を選択します。
環境に対する複数の停止アクション
- GitLab 14.10 で
environment_multiple_stop_actionsというフラグで導入されました。デフォルトでは無効です。- GitLab 15.0で一般的に利用可能に。機能フラグ
environment_multiple_stop_actionsは削除されました。
環境に対して複数の並列停止アクションを設定するには、.gitlab-ci.yml ファイルで定義されているように、同じenvironmentに対する複数のデプロイジョブにわたって on_stop キーワードを指定します。
環境が停止されると、成功したデプロイジョブのみから一致するon_stop アクションが順不同で並行して実行されます。
次の例では、test 環境に対して 2 つのデプロイジョブがあります:
deploy-to-cloud-adeploy-to-cloud-b
環境が停止すると、システムはon_stop アクションteardown-cloud-a とteardown-cloud-b を並行して実行します。
deploy-to-cloud-a:
  script: echo "Deploy to cloud a"
  environment:
    name: test
    on_stop: teardown-cloud-a

deploy-to-cloud-b:
  script: echo "Deploy to cloud b"
  environment:
    name: test
    on_stop: teardown-cloud-b

teardown-cloud-a:
  script: echo "Delete the resources in cloud a"
  environment:
    name: test
    action: stop
  when: manual

teardown-cloud-b:
  script: echo "Delete the resources in cloud b"
  environment:
    name: test
    action: stop
  when: manual
環境の削除
環境とそのすべてのデプロイを削除する場合、環境を削除します。
前提条件:
- 少なくともDeveloperロールを持っている必要があります。
- 削除する前に環境を停止する必要があります。
環境を削除するには:
- 左のサイドバーで「検索」または「移動」を選択してあなたのプロジェクトを検索します。
- オペレーション > 環境を選択します。
- 停止]タブを選択します。
- 削除したい環境の横にあるDelete environment を選択します。
- 確認ダイアログで、環境の削除を選択します。
準備または検証のために環境にアクセスします。
GitLab 13.2 で導入されました。
検証や準備など様々な目的で環境にアクセスするジョブを定義できます。これはデプロイ作成を効果的にバイパスするので、CD ワークフローをより正確に調整することができます。
これを行うには、ジョブのenvironment セクションにaction: prepare 、action: verify 、またはaction: access のいずれかを追加します:
build:
  stage: build
  script:
    - echo "Building the app"
  environment:
    name: staging
    action: prepare
    url: https://staging.example.com
これにより環境変数にアクセスできるようになり、ビルドを不正なアクセスから守ることができます。また、時代遅れのデプロイジョブを防ぐ機能を使わないようにするのも効果的です。
類似環境のグループ化
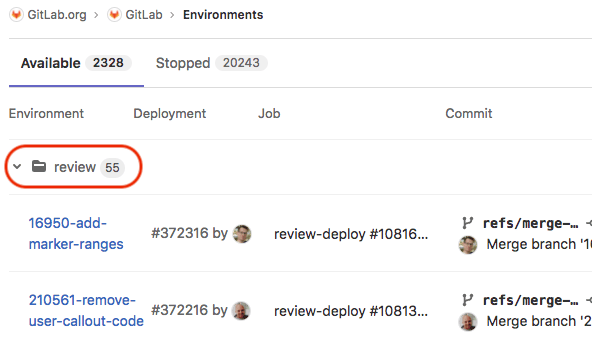
UIでは、環境を折りたたみ可能なセクションにグループ化できます。
たとえば、すべての環境がreview という名前で始まる場合、UI において、環境はその見出しの下にグループ化されます:
次の例は環境名をreview で始める方法を示しています。$CI_COMMIT_REF_SLUG 変数には実行時にブランチ名が入力されます:
deploy_review:
  stage: deploy
  script:
    - echo "Deploy a review app"
  environment:
    name: review/$CI_COMMIT_REF_SLUG
環境インシデント管理
本番環境は、管理外の理由も含め、予期せずダウンすることがあります。例えば、外部依存関係、インフラ、または人為的なエラーによって、環境に大きな問題が発生することがあります。次のようなことです:
- 依存関係にあるクラウドサービスがダウンした場合。
- サードパーティのライブラリが更新され、あなたのアプリケーションと互換性がなくなった場合。
- 誰かがあなたのサーバーの脆弱性エンドポイントにDDoS攻撃を行った場合。
- オペレーションがインフラを誤って設定した場合。
- 本番アプリケーションコードにバグが混入。
インシデント管理を使用すると、早急な対応が必要な重大な問題が発生したときにアラートを受け取ることができます。
環境に関する最新のアラートを表示
GitLab 13.4 で導入されました。
Prometheus メトリクスのアラートを設定すると、環境のアラートが環境ページに表示されます。最も深刻度の高いアラートが表示されるので、どの環境に早急な対応が必要かを特定できます。
アラートのトリガーとなったイシューが解決されると、そのイシューは削除され、環境ページには表示されなくなります。
アラートでロールバックが必要な場合、環境ページからデプロイ タブを選択し、ロールバックするデプロイを選択できます。
自動ロールバック
GitLab 13.7 で導入されました。
典型的な継続的デプロイのワークフローでは、CIパイプラインは本番環境にデプロイする前にすべてのコミットをテストします。しかし、問題のあるコードが本番環境に投入されることもあります。例えば、論理的には正しい非効率なコードが、深刻なパフォーマンス劣化を引き起こしてもテストに合格することがあります。オペレーションとSREは、このような問題をできるだけ早く発見するためにシステムを監視します。問題のあるデプロイを見つけたら、以前の安定バージョンにロールバックすることができます。
GitLab Auto Rollbackは、クリティカルなアラートが検出されたときに自動的にロールバックをトリガーすることで、このワークフローを容易にします。GitLab は最近成功したデプロイを選択して再デプロイします。
GitLab Auto Rollbackの制限事項:
- アラートが検出されたときにデプロイが実行されている場合、ロールバックはスキップされます。
- ロールバックは 3 分間に 1 回のみ実行できます。複数のアラートが一度に検出された場合、ロールバックは 1 回のみ実行されます。
GitLab Auto Rollbackはデフォルトではオフになっています。オンにするには
- 左のサイドバーで「検索」または「移動」を選択してあなたのプロジェクトを検索します。
- Settings > CI/CDを選択します。
- 自動デプロイロールバックを展開します。
- 自動ロールバックを有効にする]のチェックボックスをオンにします。
- 変更を保存を選択します。
モニター環境 (削除)
この機能はGitLab 14.7で非推奨となり、16.0で削除されました。
ウェブ端末(非推奨)
GitLab 14.5 で非推奨。
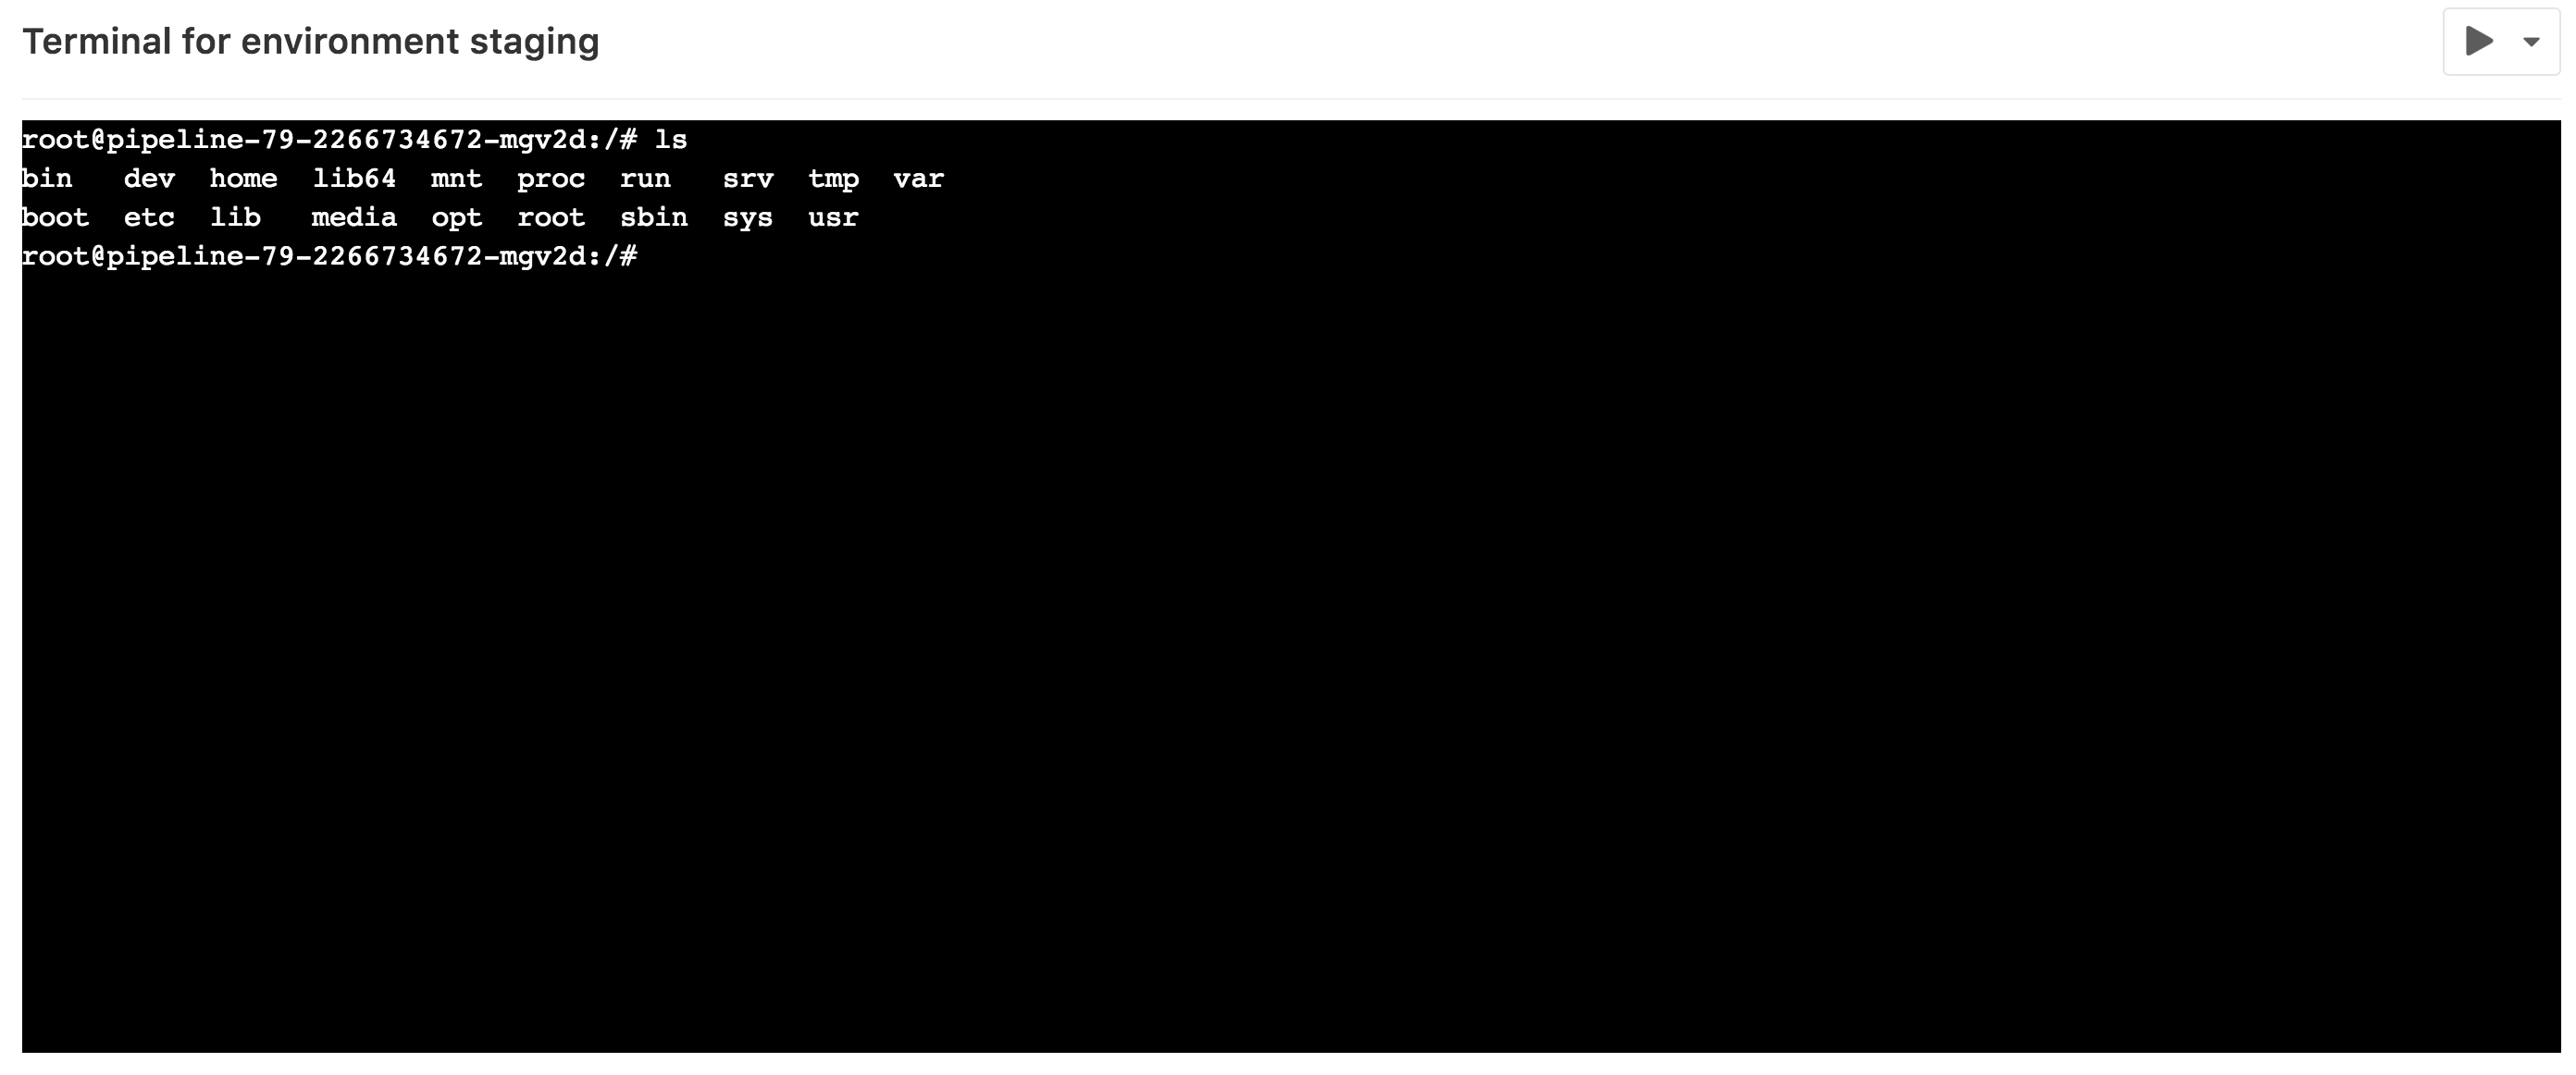
デプロイサービス(例えばKubernetesインテグレーション)の助けを借りて環境にデプロイする場合、GitLabはあなたの環境へのターミナルセッションを開くことができます。ウェブブラウザを離れることなくイシューをデバッグすることができます。
ウェブターミナルはコンテナベースのデプロイで、基本的なツール(エディタのような)が欠けていることが多く、いつでも停止したり再起動したりすることができます。この場合、すべての変更が失われます。Web ターミナルは総合的なオンライン IDE ではなく、デバッグ ツールとして扱ってください。
ウェブターミナル:
- プロジェクトのメンテナーとオーナーだけが利用できます。
- 有効にする必要があります。
UIでは、アクションメニューからターミナルを選択すると、Webターミナルを表示できます:
特定の環境のページからターミナルボタンにアクセスすることもできます:
ボタンを選択し、ターミナルセッションを確立します:
これは他のターミナルと同じように動作します。デプロイによって作成されたコンテナにいるため、次のことができます:
- シェルコマンドを実行し、リアルタイムで応答を取得します。
- ログの確認
- 設定やコードの微調整を試してください。
複数のターミナルを同じ環境に開くことができます。それぞれ独自のShellセッションや、screen やtmux のようなマルチプレクサも利用できます。
ローカルでのデプロイチェック
Git リポジトリのリファレンスはデプロイごとに保存されるので、現在の環境の状態を知るにはgit fetch をクリックするだけです。
Git の設定で、[remote "<your-remote>"] ブロックに追加の fetch 行を追加します:
fetch = +refs/environments/*:refs/remotes/origin/environments/*
古いデプロイのアーカイブ
- GitLab 14.5 で導入されました。
- GitLab.comで有効になり、GitLab 14.6で自己管理。
- GitLab 14.0で一般的に利用可能に。機能フラグ
deployments_archiveを削除しました。
プロジェクトで新しいデプロイが発生すると、GitLabはそのデプロイに対する特別なGit-refを作成します。これらのGit-refはリモートのGitLabリポジトリから入力されるので、git-fetch やgit-pull のようないくつかのGitオペレーションは、プロジェクト内のデプロイの数が増えるにつれて遅くなることに気づくかもしれません。
Gitオペレーションの効率を維持するために、GitLabは最近のデプロイ参照(50,000件まで)だけを保持し、残りの古いデプロイ参照は削除します。アーカイブされたデプロイは、UI や API を使って監査目的で利用することができます。また、アーカイブされた後でも、コミット SHA (例えば、git checkout <deployment-sha>) を指定してリポジトリからデプロイされたコミットを取得することができます。
keep-around refsとして保存するので、デプロイされたコミットはたとえdeployment refsによって参照されなくても、ガベージコレクションされません。CI/CD変数の環境スコープの制限
デフォルトでは、すべてのCI/CD変数はパイプラインのどのジョブでも利用可能です。したがって、プロジェクトがテストジョブで危険なツールを使用すると、デプロイジョブが使用したすべてのCI/CD変数が公開される可能性があります。これは、サプライチェーン攻撃でよく見られるシナリオです。GitLabは変数の環境スコープを制限することで、サプライチェーン攻撃を軽減するのに役立ちます。
CI/CD変数の環境スコープを制限するには、どの環境で利用できるかを定義します。例えば、環境スコープがproduction, の場合、その環境が production定義されたproductionジョブのみが productionこの特定の変数を持つことになります。
デフォルトの環境スコープはワイルドカード(*)です。これは、環境が定義されているかどうかに関係なく、どのジョブもこの変数を持つことができることを意味します。
環境スコープがreview/* の場合、review/ で始まる環境名を持つジョブがこの変数を利用できます。
ほとんどの場合、これらの機能は各環境グループでスコープを実装する効率的な方法を提供する_環境仕様_メカニズムを使用します。
例えば、4つの環境があるとします:
productionstagingreview/feature-1review/feature-2
それぞれの環境は以下の環境仕様にマッチします:
| 環境仕様 | production | staging | review/feature-1 | review/feature-2 |
|---|---|---|---|---|
| * | マッチ | マッチ | マッチ | マッチ |
| プロダクション | マッチ | |||
| ステージ | マッチ | |||
| review/* | マッチ | マッチ | ||
| レビュー/特集-1 | マッチ |
特定のマッチングを使用して、特定の環境を選択できます。また、ワイルドカード マッチング (*) を使用して、レビュー アプリ(review/*) のような特定の環境グループを選択することもできます。
最も具体的な仕様が他のワイルドカード マッチングよりも優先されます。この場合、review/feature-1 の指定がreview/* および* の指定よりも優先されます。
関連するトピック
- Kubernetesのダッシュボード
- GitLab CI/CDで複数の環境にデプロイ(ブログ記事)
- レビューアプリ
- 保護された環境
- 環境ダッシュボード
- デプロイの安全性
- 外部デプロイツールのデプロイの追跡
- Kubernetesデプロイの設定(非推奨)
トラブルシューティング
action: stop のジョブが実行されません。
例えば、失敗したジョブがあるステージで環境が始まるかもしれません。その場合、後のステージのジョブは開始しません。環境のaction: stop を持つジョブが後のステージにもある場合、そのジョブは開始できず、環境は削除されません。
必要なときにaction: stop が常に実行できるようにするには、次のようにします:
-
両方のジョブを同じステージに配置します:
stages: - build - test - deploy ... deploy_review: stage: deploy environment: name: review/$CI_COMMIT_REF_SLUG url: https://$CI_ENVIRONMENT_SLUG.example.com on_stop: stop_review stop_review: stage: deploy environment: name: review/$CI_COMMIT_REF_SLUG action: stop when: manual -
action: stopのジョブにneedsのエントリーを追加し、ジョブをステージ順から外れるようにします:stages: - build - test - deploy - cleanup ... deploy_review: stage: deploy environment: name: review/$CI_COMMIT_REF_SLUG url: https://$CI_ENVIRONMENT_SLUG.example.com on_stop: stop_review stop_review: stage: cleanup needs: - deploy_review environment: name: review/$CI_COMMIT_REF_SLUG action: stop when: manual
デプロイジョブが “This job could not be executed because it would create an environment with an invalid parameter” エラーで失敗しました。
GitLab 14.4で導入されました。
プロジェクトが動的環境を作成するように設定されている場合、動的に生成されたパラメータを環境作成に使用できないため、このエラーに遭遇する可能性があります。
たとえば、プロジェクトに次のような.gitlab-ci.yml :
deploy:
  script: echo
  environment: production/$ENVIRONMENT
$ENVIRONMENT という変数がパイプラインに存在しないため、GitLab はproduction/ という名前で環境を作成しようとします。これは環境名の制約では無効です。
この問題を解決するには、次のいずれかの解決策を使います:
- デプロイジョブから
environmentキーワードを削除します。GitLabはすでに無効なキーワードを無視しているため、キーワードを削除してもデプロイパイプラインはそのまま維持されます。 - パイプラインに変数が存在することを確認してください。サポートされている変数の制限をレビューしてください。
レビューアプリでこのエラーが発生した場合
例えば、.gitlab-ci.yml に以下のような記述がある場合:
review:
  script: deploy review app
  environment: review/$CI_COMMIT_REF_NAME
ブランチ名bug-fix! で新しいマージリクエストを作成すると、review ジョブはreview/bug-fix! で環境を作成しようとします。しかし、! は環境に対して無効な文字であるため、デプロイジョブは環境なしで実行しようとして失敗します。
この問題を解決するには、次のいずれかの解決策を使います:
-
bug-fixのように、無効な文字を除いた機能ブランチを再作成してください。 -
CI_COMMIT_REF_NAMEの定義済み変数を、無効な文字を取り除いたCI_COMMIT_REF_SLUGに置き換えてください:review: script: deploy review app environment: review/$CI_COMMIT_REF_SLUG
デプロイ参照が見つかりません。
GitLab 14.5から、GitLabはGitリポジトリのパフォーマンスを維持するために古いデプロイメント参照を削除します。
アーカイブされたGit-refを復元する必要がある場合は、自己管理するGitLabインスタンスの管理者に頼んで、Railsコンソール上で以下のコマンドを実行してもらいましょう:
Project.find_by_full_path(<your-project-full-path>).deployments.where(archived: true).each(&:create_ref)
GitLabはパフォーマンス上の懸念から、将来的にこのサポートをやめるかもしれません。この機能の動作については、GitLab Issue Trackerでイシューを開いて議論することができます。

